Generate Ejari Unified Tenancy & Form A documents in PropSpace
You can now automatically generate and populate Ejari Unified Tenancy contracts and Form A documents for your properties directly from PropSpace.
We are also working on adding RERA Forms F and I, which will be released shortly to all PropSpace users.
Ejari Unified Tenancy Contracts
How to generate a new contract?

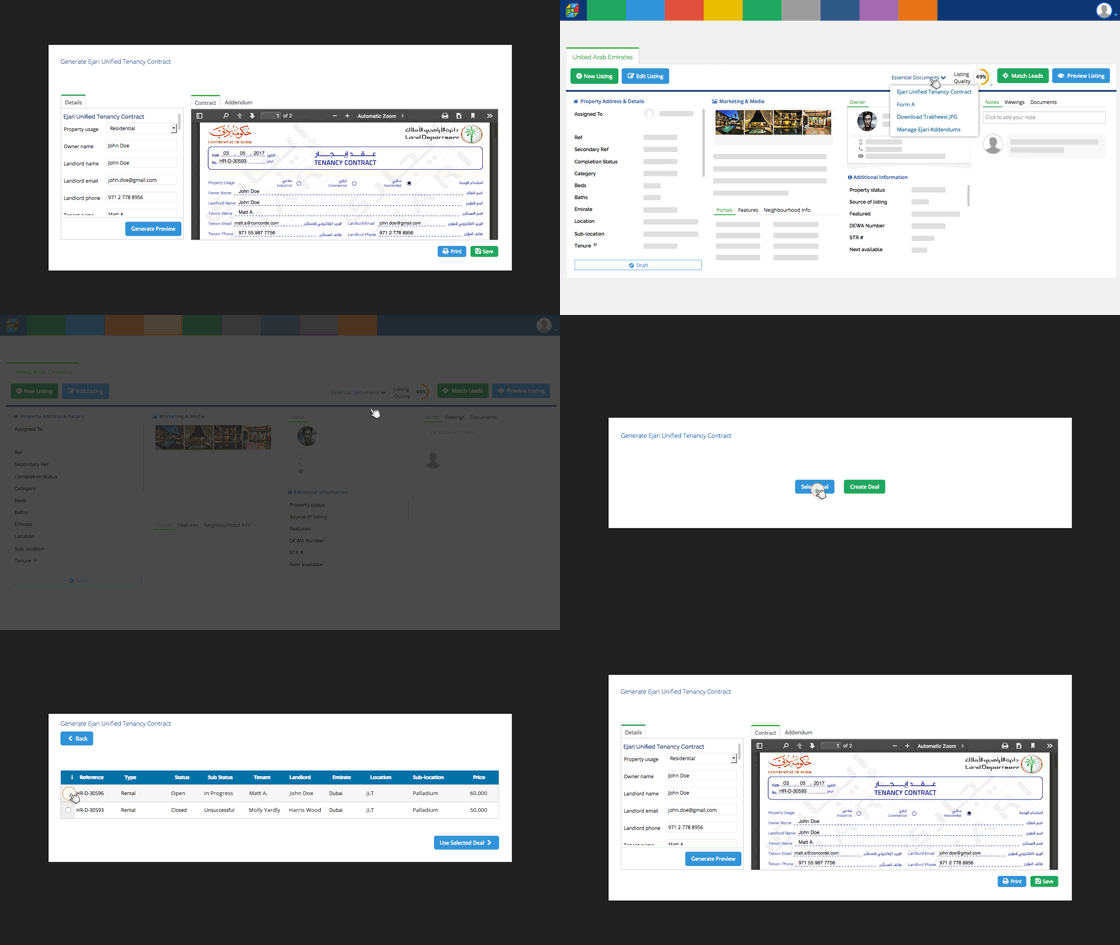
1. Select a rental listing you wish to generate the contract for.
2. Click on the Essential Documents link in the actions bar. Choose the Ejari Unified Tenancy Contract option in the dropdown.
3. Select an existing deal for the record, or create a new one.
4. The next window displays the auto-populated fields and the preview of the document. You can make changes to the values if changes are required.
5. Click on the Generate Preview button to update the document in the preview panel. If it all looks good, you can save or print the contract and then send to your client for their signature.
How to set up an addendum template?

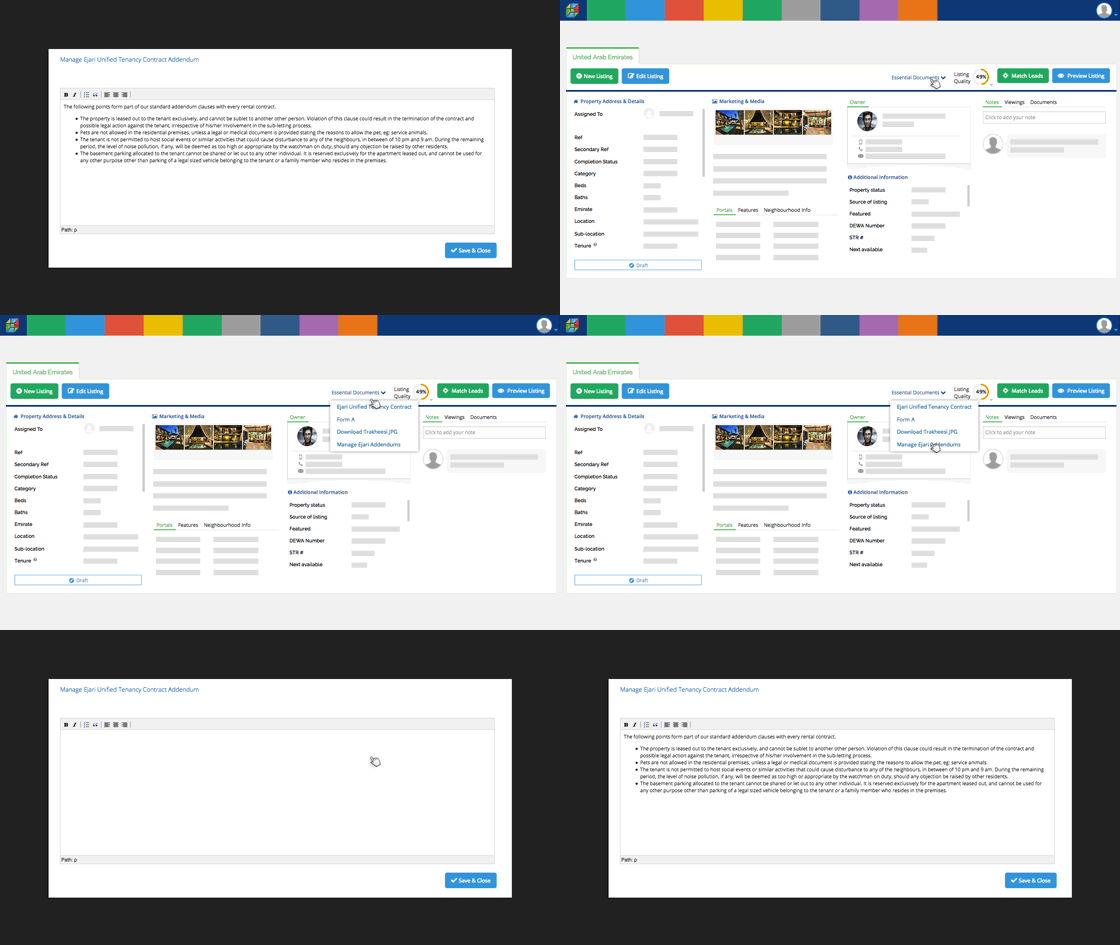
1. Click on the Essential Document link on the listing page.
2. Select the Manage Ejari Addendum option in the dropdown.
3. In the popup window, you can create a standard addendum to use as a template for all future Ejari contracts.
4. Save your changes when done.


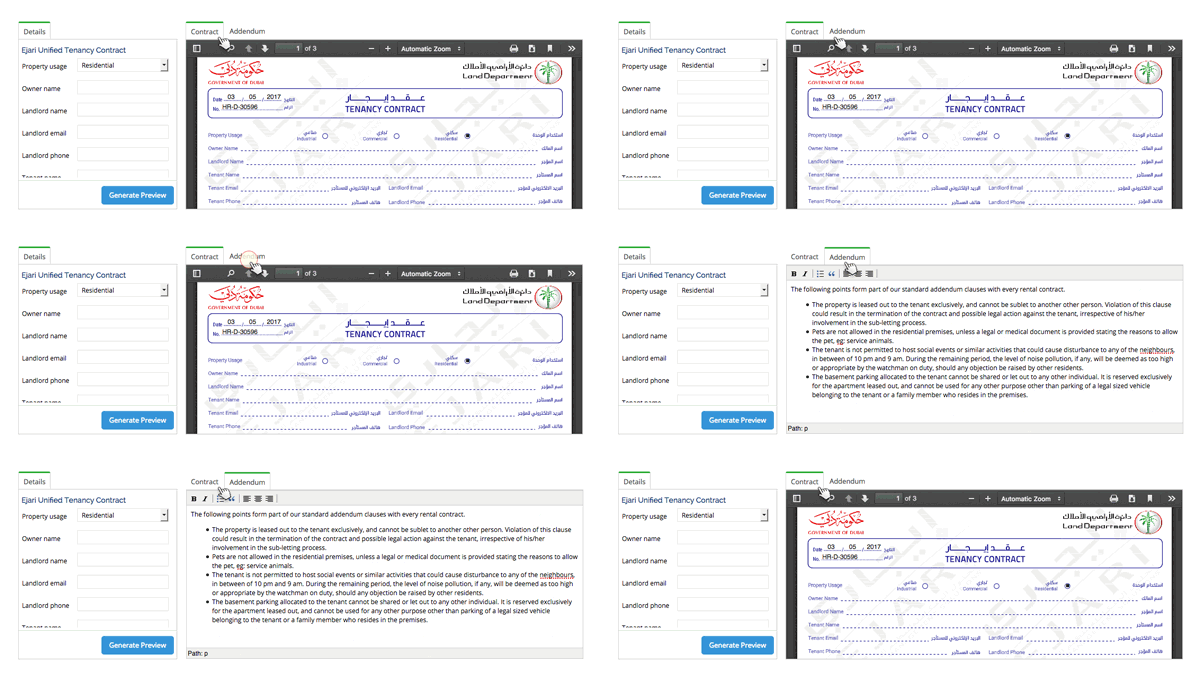
1. Generate an Ejari contract for the required listing.
2. On the preview panel, click on the Addendum tab.
3. Add or edit in the addendum clauses and click on Update.
4. The addendum clauses will be appended to the Ejari Unified Tenancy contract.
Form A document

1. Select a listing you wish to generate the Form A document for.
2. Click on the Essential Documents link and select Form A.
3. A new window will display the fields to populate and a preview of the document. Fields will be auto-populated, but can be modified as required.
4. Click on the Generate Preview button to update the document in the preview panel. If satisfied with the result, you can opt to save or print the PDF document and send to your client for their signature.

